Royal Icing Poinsettias In Edible Glass

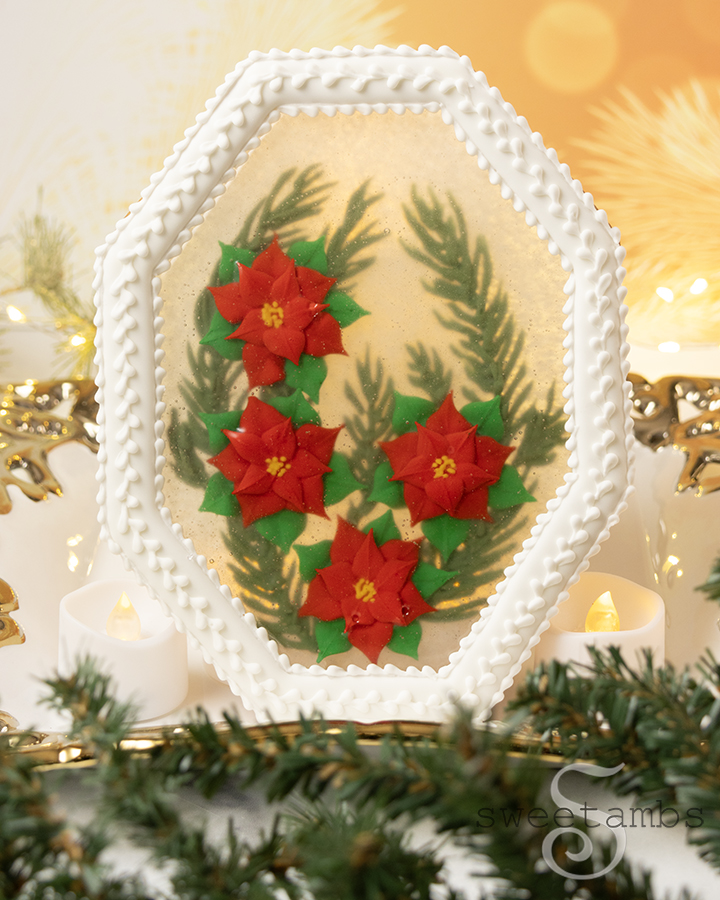
This edible holiday centerpiece made with Isomalt and royal icing poinsettias was inspired by pressed flowers in glass. I’ll show you how I made it in the latest tutorial in my Cookie Art Club!

I’m still new to working with Isomalt so I have a lot left to learn about it, but I love how this piece turned out!

An edible holiday centerpiece with royal icing poinsettias and royal icing evergreen branches encased in isomalt inside of a white octagon shaped cookie frame covered in royal icing. The centerpiece is in front of a golden bokeh lights background and there are artificial evergreen boughs on the table in front of the centerpiece.An edible holiday centerpiece with royal icing poinsettias and royal icing evergreen branches encased in isomalt inside of a white octagon shaped cookie frame covered in royal icing. The centerpiece is in front of a golden bokeh lights background and there are artificial evergreen boughs on the table in front of the centerpiece.

You can watch this members-only video tutorial (without ads!) when you join my Cookie Art Club!

Get access to exclusive cookie decorating tutorials, my cookie and royal icing recipes, and individualized cookie decorating advice by joining my Cookie Art Club!

A close up of the edible holiday centerpiece with royal icing poinsettias and royal icing evergreen branches encased in isomalt inside of a white octagon shaped cookie frame covered in royal icing. The centerpiece is in front of a golden bokeh lights background and there are artificial evergreen boughs on the table in front of the centerpiece.A close up of the edible holiday centerpiece with royal icing poinsettias and royal icing evergreen branches encased in isomalt inside of a white octagon shaped cookie frame covered in royal icing. The centerpiece is in front of a golden bokeh lights background and there are artificial evergreen boughs on the table in front of the centerpiece.A close up of the edible holiday centerpiece with royal icing poinsettias and royal icing evergreen branches encased in isomalt inside of a white octagon shaped cookie frame covered in royal icing. The centerpiece is in front of a golden bokeh lights background and there are artificial evergreen boughs on the table in front of the centerpiece.

This post contains affiliate links. Read my affiliate disclosure here.

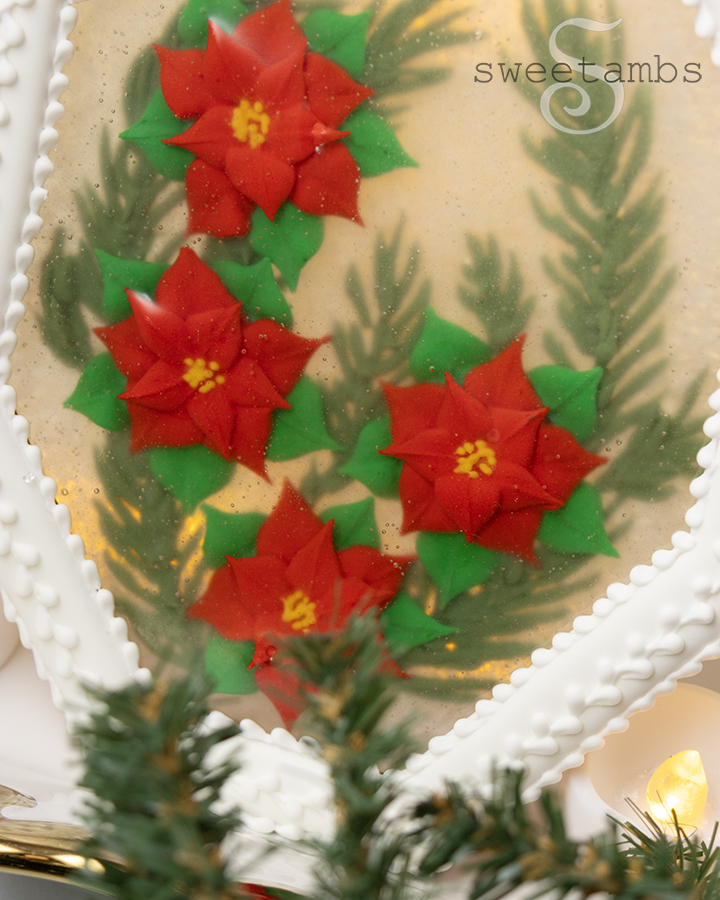
As I mentioned, I am still new to working with Isomalt (as you can see by all of the air bubbles in this edible glass! 🫣), but there are great tips on using Isomalt in this post from The Sugar Arts Institute.

Isomalt is sweet and acts very much like sugar when it is melted, but it’s actually a sugar substitute! The Isomalt that I use is pre-cooked, which is easier to use than raw Isomalt crystals because it only needs to be melted in the microwave or on the stove rather than cooked to a specific temperature in order to use it.

A hand with white shimmery nail polish is holding the edible holiday centerpiece with royal icing poinsettias and royal icing evergreen branches encased in isomalt inside of a white octagon shaped cookie frame. The centerpiece is in front of a gold filigree rimmed platter and fairy lights.A hand with white shimmery nail polish is holding the edible holiday centerpiece with royal icing poinsettias and royal icing evergreen branches encased in isomalt inside of a white octagon shaped cookie frame. The centerpiece is in front of a gold filigree rimmed platter and fairy lights.A hand with white shimmery nail polish is holding the edible holiday centerpiece with royal icing poinsettias and royal icing evergreen branches encased in isomalt inside of a white octagon shaped cookie frame. The centerpiece is in front of a gold filigree rimmed platter and fairy lights.

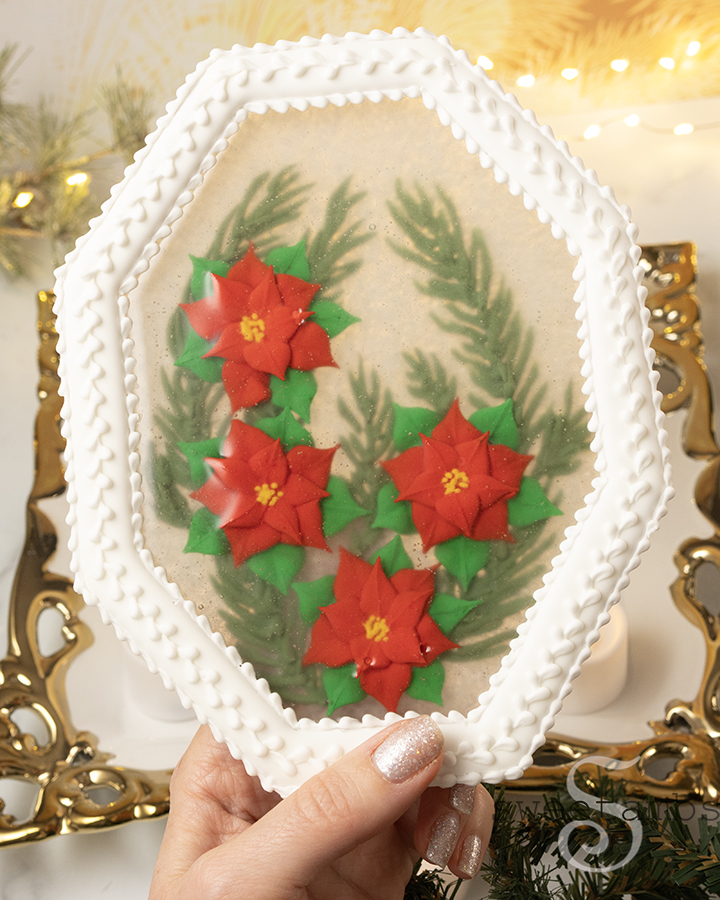
I was concerned that the hot Isomalt would damage the royal icing poinsettias when it was poured into the gingerbread cookie frame, but fortunately the royal icing held up! You can see the process in this video in the Cookie Art Club.

Here’s what you’ll need to make Royal Icing Poinsettias In Edible Glass

These supplies are available in my Amazon store unless otherwise noted

  • Chilled sheet of gingerbread cookie dough 
  • Cookie frame template
  • Knife to cut cookie frame pieces
  • Royal icing
  • Super Red, Leaf Green, and Lemon Yellow food coloring (I used Ann Clark brand food coloring)
  • Pre-cooked isomalt (I used Satin Ice brand)
  • Silicone mat (I used a Silpat)
  • Scribe tool
  • 5 12” Decorating bags
  • 2 tipless decorating bags
  • Decorating tips Wilton 3, 352, and PME 2
  • Couplers & Bag ties (I used Wilton brand)
  • Parchment squares
  • Flower nail
  • Edible glue (I used Fondx brand)
  • Sparkling sugar (I used King Arthur brand)

Relevant tutorials: Royal Icing 101 and How To Pipe A Bead Border (both are available in the Cookie Art Club)

A close up of the edible holiday centerpiece with royal icing poinsettias and royal icing evergreen branches encased in isomalt inside of a white octagon shaped cookie frame covered in royal icing. The centerpiece is in front of a golden bokeh lights background and there are artificial evergreen boughs on the table in front of the centerpiece.A close up of the edible holiday centerpiece with royal icing poinsettias and royal icing evergreen branches encased in isomalt inside of a white octagon shaped cookie frame covered in royal icing. The centerpiece is in front of a golden bokeh lights background and there are artificial evergreen boughs on the table in front of the centerpiece.A close up of the edible holiday centerpiece with royal icing poinsettias and royal icing evergreen branches encased in isomalt inside of a white octagon shaped cookie frame covered in royal icing. The centerpiece is in front of a golden bokeh lights background and there are artificial evergreen boughs on the table in front of the centerpiece.

Want to make this centerpiece yourself? The video tutorial and recipes to recreate it are available to Cookie Art Club members and you can try it free for 7 days.

Let me know if you make this cookie and share your photos with me in the Cookie Art Club!

Leave a comment