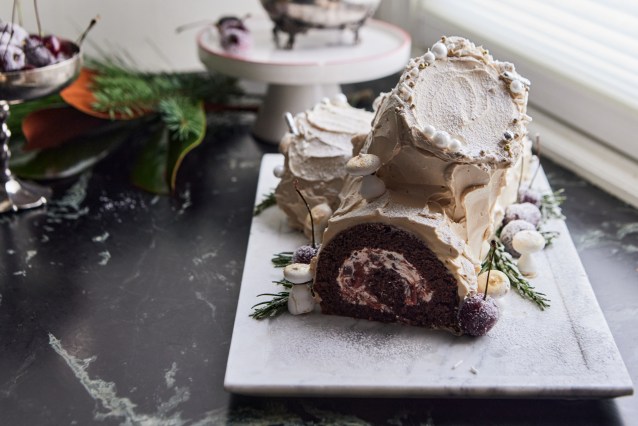
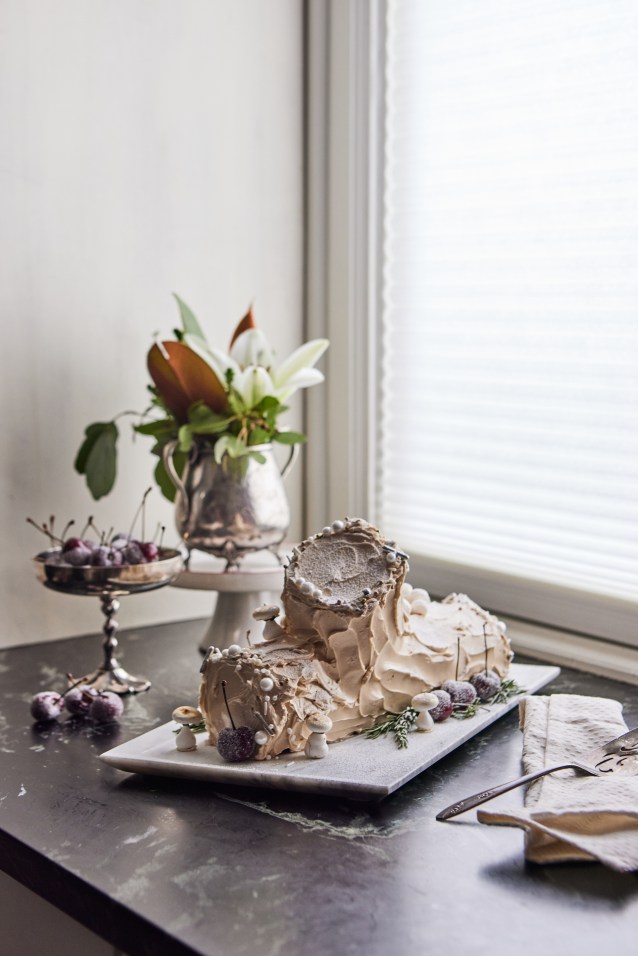
Bûche de Noël is a fun, festive cake resembling a holiday yule log. It’s a beautiful cake that’s perfect as a Christmas dessert.
This is a classic French dessert that is served at Christmas time. Bûche de Noël translates as the “Christmas Log” and is meant to look like the piece of wood you are about to toss into the fireplace. It is a rather odd tradition and yet I find myself making one every year. It always reminds me of the TV station that plays Christmas music and shows nothing but a burning log in a fireplace. I thought those were just memories of my long ago childhood, but I was amazed to see that the burning log still finds its place on YouTube even today.
More Holiday Recipes
History of Bûche de Noël
Despite my unglamorous association there is something quite elegant and beautiful about the Bûche de Noël. According to Larousse Gastronomique the yule log cake tradition started in the 1870s when Parisian pastry chefs decided to replace the less elaborate brioche style fruit loaf with this more festive confection. Although I am quite partial to the Panettone style breads, I can see why pastry chefs created something a little more fussy to work on, that is just how we are!
How To Make Bûche de Noël (Video Tutorial)
Yule Log Cake Garnishes
- Sugared Cranberries
- Edible Flowers
- Shaped Marzipan
- Chocolate shavings
How to Assemble Bûche de Noël
Find the full recipe below.
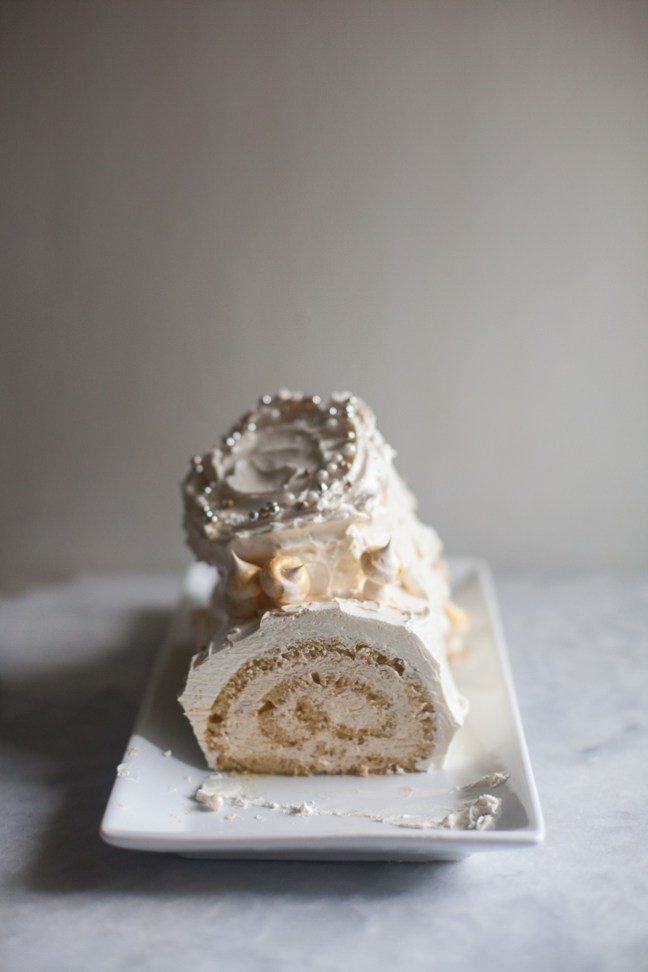
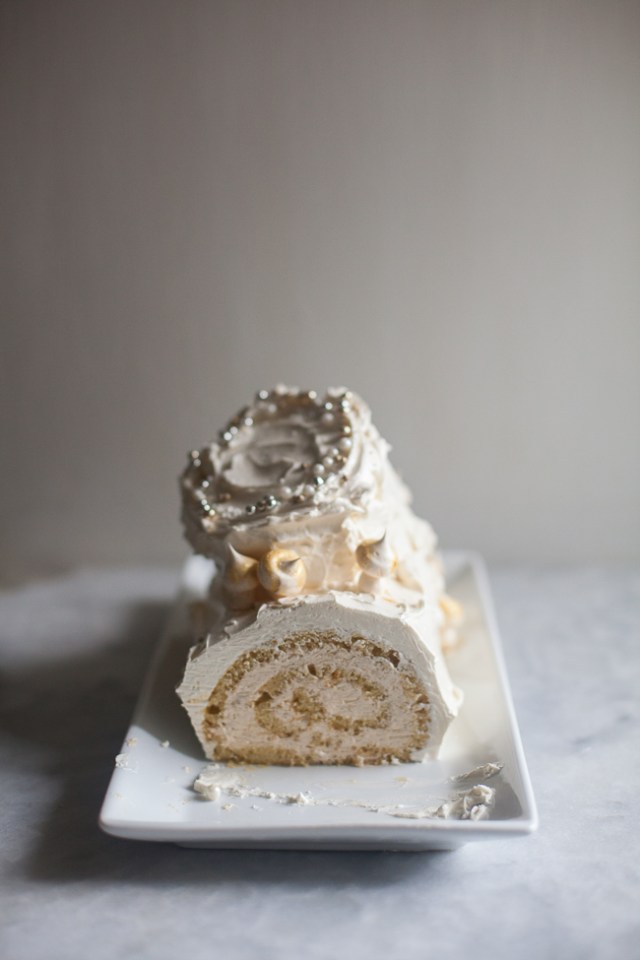
(Here is the recipe for the praline buttercream you see in the photos) – the following directions match the yule log in my video.
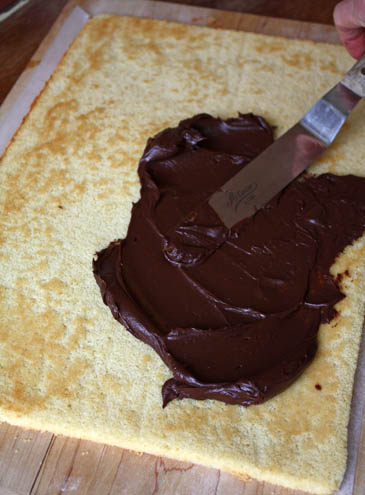
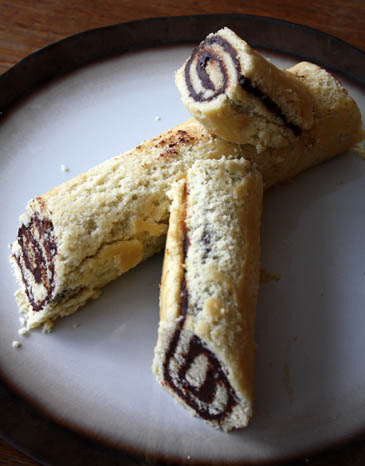
- Unroll the cake and spread all but a 1/4 cup of the cooled ganache over the complete surface of the cake with an offset spatula.
- Using the parchment to help you roll the cake over the ganache into a tight log starting at the long end.
- Wrap the log of cake and refrigerate for at least an hour to set the ganache, which will make the cake easier to work with.
- Once the cake is chilled cut it at an angle in half. Cut one of the halves again making one of the pieces 1/4 and the other 3/4. Place the 3/4 piece against the half log and the 1/4 piece will sit on top of the half log.
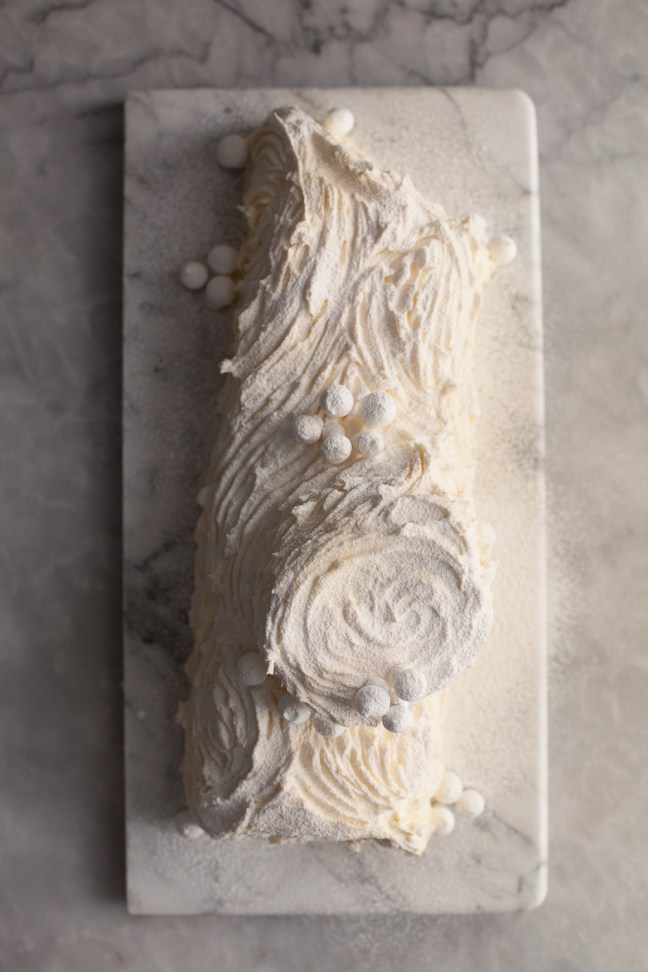
- Spread the buttercream over the surface of the cake. You want to create the appearance of bark so don’t worry about it being too smooth, you probably will not use all of the buttercream. I even swirl the ends to resemble the cut end of the log. Save at least a small portion of the buttercream to mix with the reserved ganache.
- Blend the reserved ganache with the buttercream to create a contrasting color. Use your spatula to spread this onto the log in patches. You want to be able to see the lighter buttercream underneath.
- Use a fork to create the bark texture on the Bûche de Noël and swirl the two buttercream colors together.
- Create peeling bark for your Bûche de Noël by shaving a chocolate bar with a sharp knife. Sprinkle it over the top of the log and then dust with powdered sugar snow.
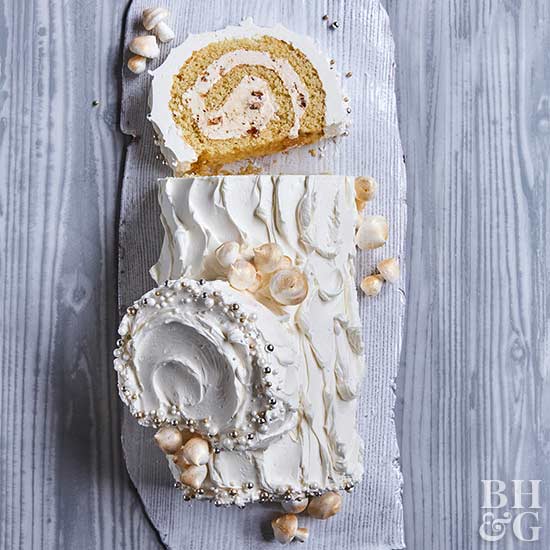
- Recipe for the meringue mushrooms decor can be found in the Better Homes and Gardens article.
More Bûche de Noël Recipe Ideas (Plus A Bonus Recipe)
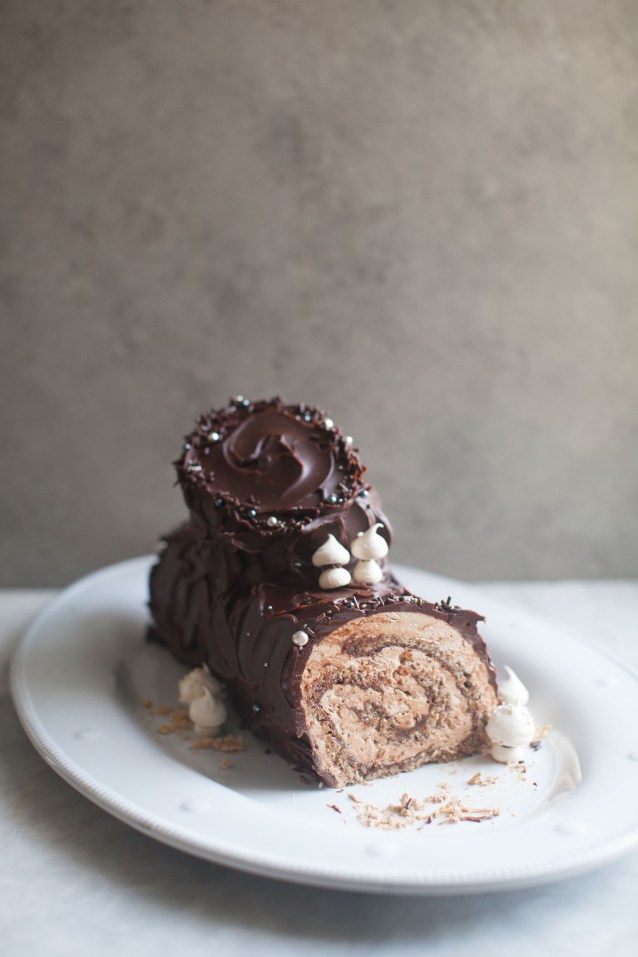
I’ve made several versions of the yule log cake over the years, including the chocolate version above from Zoë Bakes Cakes! I also have this bonus recipe that was featured on Holiday Party with Andrew & Zoë on Magnolia Network!
Bonus Yule Log Cake Recipe
Ingredients
Cocoa Sponge Cake
- 3/4 cup (90g) cake flour
- 1/4 cup (25g) dutch-processed cocoa
- 1 1/4 teaspoons baking powder
- 1/4 teaspoon kosher salt
- 1 teaspoon espresso powder
- 5 large eggs, separated
- 3/4 cup plus 2 tablespoons (175g) granulated sugar, divided
- 1 tablespoon vanilla extract
- Confectioners’ sugar for dusting towel
Cherry Chocolate Chip Ricotta Filling
- 1/2 cup whole milk ricotta
- 1 1/2 cups heavy whipping cream
- 3 tablespoons powdered sugar
- 1 1/4 cups frozen cherries (dark sweet or sour) thawed and drained
- 3/4 cup mini chocolate chips
Swiss Meringue & Espresso Buttercream
- 1 cup egg whites from about 8 eggs, at room temperature
- 2 cups (400g) granulated sugar
- 1 1/2 pounds 6 sticks unsalted butter, cut into 2-tablespoon sized pieces, at room temperature
- 1 teaspoon vanilla extract
- 1 tablespoon espresso powder
For Decorating and Finishing:
- Chocolate ganache for mushrooms
- Gold edible luster dust optional
- Silver gold, and white dragees and/or large nonpareils optional
- Fresh cherries brushed with pasteurized egg whites and dusted with sugar (optional)
Instructions
To make the Cocoa Sponge Cake:
- Preheat the oven to 375 degrees F. Line a 18×13-inch sheet tray with greased parchment paper.
- In a large bowl, whisk together the flour, cocoa powder, baking powder, espresso powder and salt.
- In a stand mixer fitted with the whisk attachment, beat the egg yolks with half of the sugar and vanilla on high speed for 5 minutes or until light, fluffy, and tripled in volume. Transfer yolk mixture to a large bowl and then clean the mixing bowl and whisk attachment well.
- Whip the egg whites on high speed until foamy, turn speed to medium low and slowly add the remaining sugar. Turn speed to high and whip until the whites are stiff peaks. Using a rubber spatula, gently fold the whites into the yolks 1/3 at a time. Sift the flour mixture over the egg foam and gently fold together.
- Spread batter evenly onto prepared pan. Bake about 12 minutes or until cake is set and springs back when touched.
- While the cake is baking lay a clean kitchen towel on a work surface and generously dust with confectioners’ sugar. Use a small knife to loosen edges of the cake. Quickly invert hot cake onto towel. Peel off parchment paper and roll hot cake and towel into a log starting at a short end. Let cool completely on a wire rack.
To make the Sour Cherry Filling:
- In a stand mixer with the whisk attachment, whip the heavy cream, ricotta and powdered sugar until stiff, smooth peaks form. Fold in the chocolate chips and sour cherries. After the cake is completely cool, carefully unroll and spread the filling evenly over the unrolled cake. Re-roll the filled cake tightly, wrap with plastic and place in the refrigerator to chill for at least 1 hour and up to 1 day ahead.
For Meringue Mushrooms & Swiss Buttercream:
- In a large heatproof bowl whisk together egg whites and sugar. Mixture will be thick and grainy. Place bowl over a saucepan of simmering water, being careful that bowl doesn’t touch water. Whisk for 10 minutes or until 160 degrees F, sugar is completely dissolved, and mixture is smooth.
- Remove bowl from saucepan. Beat mixture with a mixer on medium-high 8 to 12 minutes or until light, fluffy, glossy, and stiff peaks form. To pipe the mushrooms, transfer 1/2 cup meringue to a pastry bag fitted with a 1/4-inch round tip.
- Preheat oven to 175 degrees F.
- To create the mushroom caps, pipe half the meringue in the pastry bag into 3/4- to 1-inch mounds on a baking sheet lined with parchment paper, you should have about 20 mounds. Pipe remaining meringue into squat stems that come to a point, you should have about 20 stems. Bake for 30 minutes. Turn off the oven. Leave the door closed and let meringues stand in cooling oven for 1 hour. Meringues can be made 1 day ahead. Store in an airtight container at room temperature.
- Using a paring knife or wooden skewer, poke a small hole into center of flat side of mounds. Dip stem tips in chocolate ganache, then insert into holes in mounds to create mushrooms. If desired, paint tops of mushrooms with gold luster dust.
- To finish the buttercream: To the remaining meringue in the stand mixer with the whisk attachment, beat in butter 2 tablespoons at a time on medium speed until fully incorporated, about 10 minutes. After all the butter has been added, beat 1 minute more or until buttercream is creamy and glossy. In a small bowl, dissolve the espresso powder in the vanilla, mixing to combine. Beat in the vanilla mixture and a pinch of salt.
To Assemble:
- Take the chilled, filled cake out of the refrigerator. Cut off a few inches from the end of the roll at an angle to make a branch. Transfer the long portion (the log) to a serving platter. Frost one end of branch with enough buttercream that it sticks to log; gently press branch onto the top of log. Frost entire cake, dragging a spatula or fork to create the bark texture. Decorate with dragees, meringue mushrooms, sugared cherries and luster dust, if using.
Vanilla Chiffon Roll
- 1 ½ cups sugar
- 1 cup all-purpose flour
- 1 tsp baking powder
- 1 tsp baking soda
- ¼ tsp salt
- 4 large eggs, separated
- ½ cup vegetable or safflower oil
- ½ cup water
- 2 tbsp pure vanilla extract GET RECIPE
- 2 large egg whites
Ganache
- 6 ½ oz bittersweet chocolate
- 2 oz milk chocolate
- ½ vanilla bean
- ½ cup heavy cream
Buttercream (See notes)
Vanilla Chiffon Roll
-
Preheat the oven to 350°F and prepare a Jelly Roll Baking Sheet with butter and a sheet of parchment.
-
Sift together 1 cup of the sugar, flour, baking powder, and baking soda onto a sheet of parchment; add the salt.
-
In a large bowl, whisk the yolks, oil, water and vanilla until blended. Add the dry ingredients gradually to the yolk mixture, whisking all the while; set aside.
-
Beat the 6 egg white in a stand mixer on low speed until foamy. Increase the speed to medium-high and gradually add the remaining sugar, beating until the whites are thick and shiny and hold medium peaks.
-
Fold 1/3 of the whites into the yolk/flour mixture to lighten it, then turn the yolk mixture into the whites and gently fold together until thoroughly incorporated.
-
Pour the batter onto the prepared baking sheet, spreading it evenly with an Offset Spatula. Bake the cake in the center of the oven for 10-12 minutes, until the edges just start to pull away from the sides of the pan. Immediately invert the cake and roll it into a log. See my video to watch me do this.
Ganache
-
Place the chopped chocolate in large bowl. Split the vanilla bean lengthwise down the middle and scrape out the seeds. Put the heavy cream in a sauce pot on medium heat. Place the vanilla bean and seeds in the cream, bring to a boil.
-
Remove from heat and add chocolate to the cream, remove the vanilla bean. Make sure all the chocolate is submerged in the hot cream. Let sit for about 3 minutes then stir gently until perfectly smooth.
-
Pour into a glass baking dish and allow to set up at room temperature, about an hour.
Assembly
-
(Here is the recipe for the praline buttercream you see in the photos) – the following directions match the yule log in my video.
-
Unroll the cake and spread all but a 1/4 cup of the cooled ganache over the complete surface of the cake with an offset spatula.
-
Using the parchment to help you roll the cake over the ganache into a tight log starting at the long end.
-
Wrap the log of cake and refrigerate for at least an hour to set the ganache, which will make the cake easier to work with.
-
Once the cake is chilled cut it at an angle in half. Cut one of the halves again making one of the pieces 1/4 and the other 3/4. Place the 3/4 piece against the half log and the 1/4 piece will sit on top of the half log.
-
Spread the buttercream over the surface of the cake. You want to create the appearance of bark so don’t worry about it being too smooth, you probably will not use all of the buttercream. I even swirl the ends to resemble the cut end of the log. Save at least a small portion of the buttercream to mix with the reserved ganache.
-
Blend the reserved ganache with the buttercream to create a contrasting color. Use your spatula to spread this onto the log in patches. You want to be able to see the lighter buttercream underneath.
-
Use a fork to create the bark texture on the Bûche de Noël and swirl the two buttercream colors together.
Rate and Review!
-
If you’ve made this recipe, please leave a rating and review! I love to hear how you’ve adapted my recipes to your own tastes, so please share how it went for you. It helps other people find my recipes. Thank you!